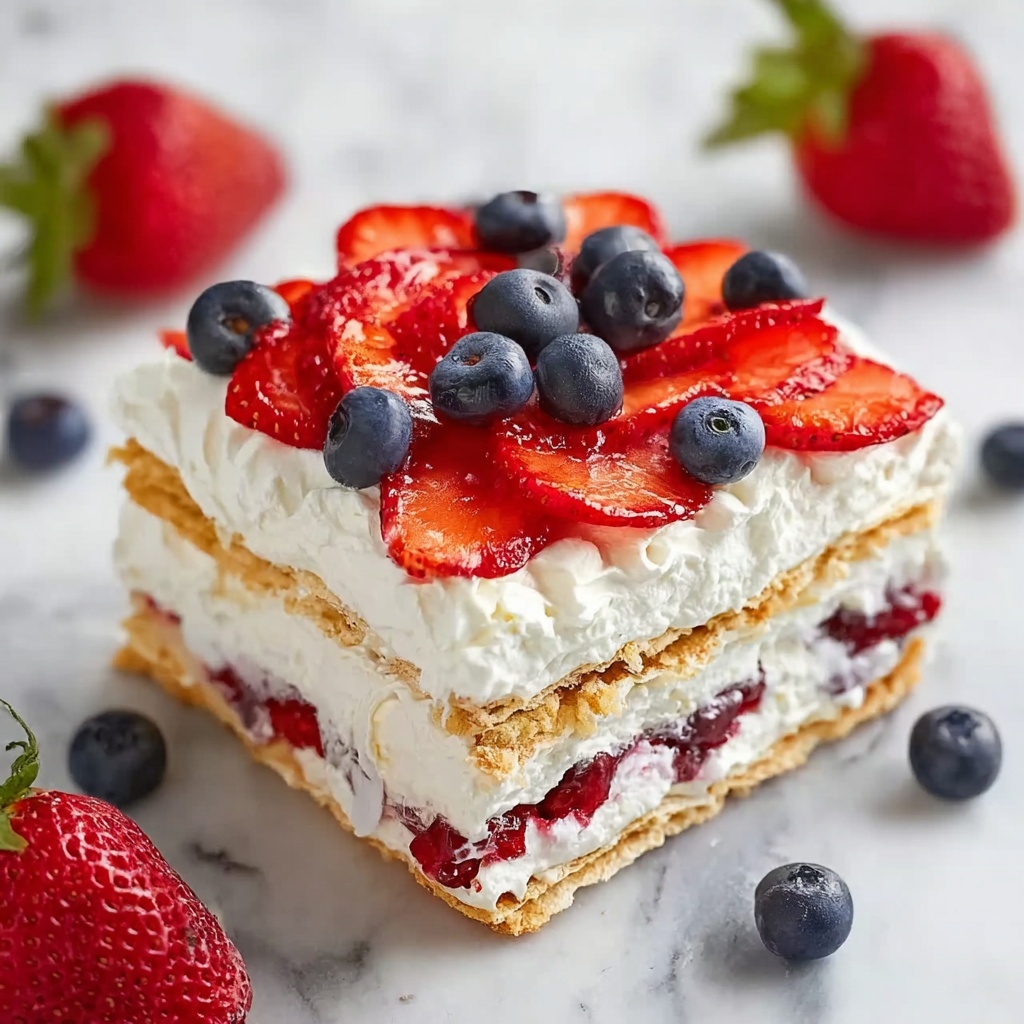
If you’ve ever dreamed of a dessert that captures the vibrant colors of summer and tastes like a celebration in every bite, this Red White Blue Icebox Cake Recipe is your new best friend. Combining layers of crunchy graham crackers, creamy vanilla pudding, fluffy whipped topping, and fresh red strawberries with blueberry bursts, this no-bake cake is as simple as it is stunning. Perfect for warm weather gatherings or patriotic holidays, it brings a delightful mix of textures and flavors that everyone will rave about.
Ingredients You’ll Need
Ingredients You’ll Need
Creating this Red White Blue Icebox Cake Recipe is straightforward and requires ingredients that come together to create the perfect balance of taste and texture. Each adds something special—from the graham crackers’ crunch to the luscious cream cheese blend that gives it body and tang.
- Graham crackers (22-24 pieces): These form the crisp base and layers, adding subtle sweetness and an essential crunch.
- Cream cheese (8 ounces): Adds richness and a slight tang that balances the sweetness beautifully.
- Instant vanilla pudding mix (2 boxes): Provides thick, smooth creaminess and that classic vanilla flavor.
- Cold 2% milk (3 cups): Helps create the pudding’s perfect silky texture when mixed with the instant pudding mix.
- Frozen whipped topping (2 containers, thawed): Gives the filling a light, airy, and fluffy quality that feels indulgent without being heavy.
- Sliced strawberries (3 cups): Fresh, juicy, and vibrant red, these bring natural sweetness and bright color.
- Blueberries (2 cups): Their subtle tartness perfectly complements the strawberries while adding vivid blue hues to the dessert.
How to Make Red White Blue Icebox Cake Recipe
Step 1: Build the Base
Start by arranging a tight single layer of graham crackers at the bottom of a 9×13 baking dish. This foundation is key because it stabilizes the cake and creates a lovely crunchy contrast to the creamy layers you’ll build on top.
Step 2: Prepare the Creamy Filling
In a large bowl, use an electric mixer to blend the cream cheese with the instant vanilla pudding mix. Beat on medium speed until smooth to eliminate lumps, which usually takes about two minutes. Gradually pour in the cold milk while continuing to mix until the texture is velvety and uniform—this luscious base makes the whole dessert irresistible.
Step 3: Fold in the Whipped Topping
Gently fold the thawed whipped topping into the pudding mixture until it’s blended thoroughly and there are no white streaks left. This step is crucial for giving the cake its lightness, ensuring each bite feels fluffy and airy rather than dense.
Step 4: Layer the Cake
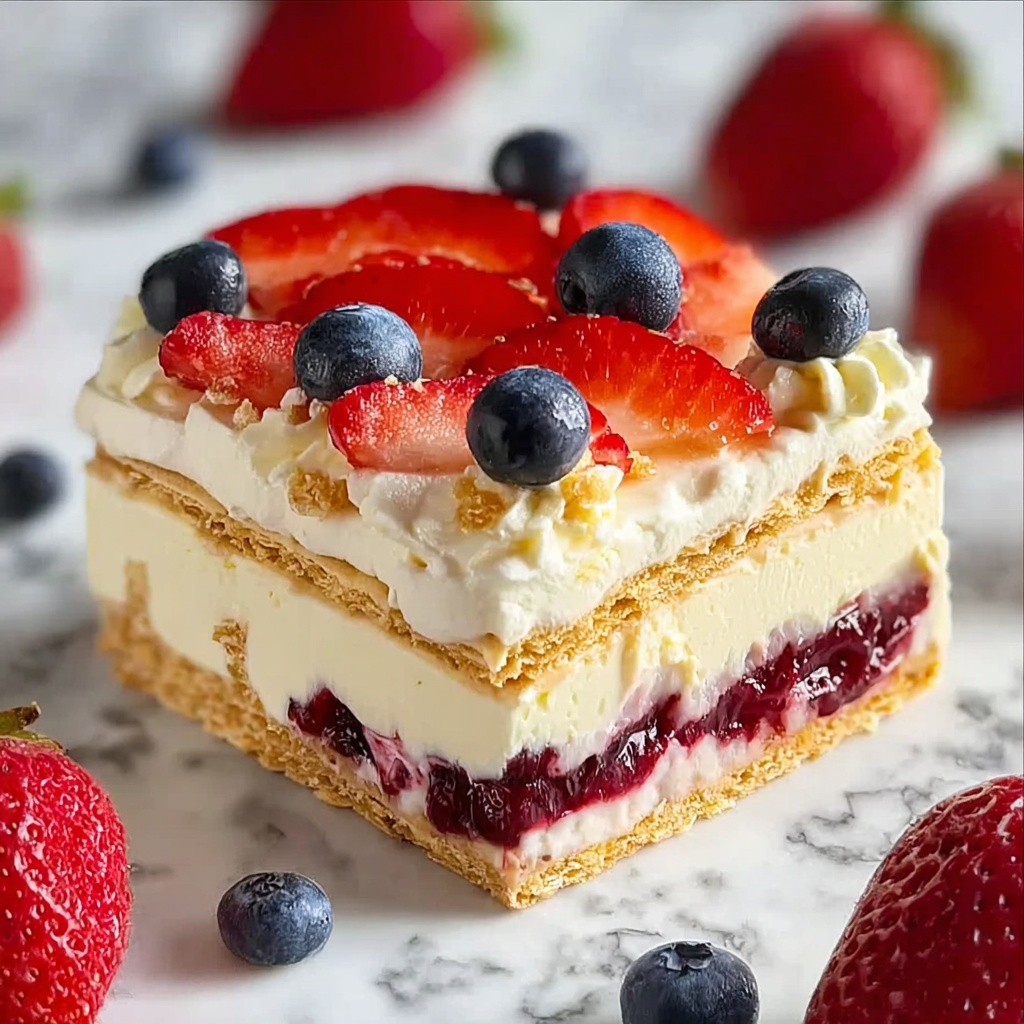
Spread about one-third of the creamy pudding mixture evenly over the graham crackers. Then scatter one-third of your sliced strawberries and blueberries on top. Repeat this process two more times. The visual layering of red, white, and blue is what makes this cake such a showstopper, so be generous with the fruit on the final layer.
Step 5: Chill to Perfection
Refrigerate your icebox cake for at least four hours to let all the flavors mingle and for the graham crackers to soften just enough without losing their structure. For a deeper melded flavor experience, chilling overnight is even better.
Step 6: Freeze Before Serving
About 30 to 45 minutes before serving, pop your cake into the freezer. This step firms up the whole dessert, making slicing a breeze and keeping the layers intact without crumbling.
Step 7: Slice and Impress
Use a sharp knife to cut neat slices, then present with a flourish of extra fresh strawberries, blueberries, or even fresh mint leaves for a pop of green. Your guests will be dazzled by both the flavor and the festive presentation.
How to Serve Red White Blue Icebox Cake Recipe
Garnishes
For garnishes, think fresh and bright—sprigs of mint add a refreshing herbaceous note, while whole strawberries and plump blueberries provide a vibrant, natural beauty. A dusting of powdered sugar is a lovely finishing touch that makes your cake sparkle without overpowering flavors.
Side Dishes
This icebox cake shines as the centerpiece dessert but pairs wonderfully with light sides like a crisp green salad with a citrus vinaigrette or simple grilled chicken for a well-rounded summer meal. Its fruity profile complements savory dishes without clashing.
Creative Ways to Present
Try serving individual portions in clear glass jars or cups to show off the distinct red, white, and blue layers. Alternatively, you can arrange slices on a platter with a drizzle of berry coulis or a dollop of lemon curd to elevate the flavors and impress guests visually.
Make Ahead and Storage
Storing Leftovers
After enjoying your Red White Blue Icebox Cake Recipe, store any leftovers covered tightly in the refrigerator. It will stay fresh for up to three days, giving you easy, ready-to-enjoy portions for quick snacks or another dessert round.
Freezing
While freezing the whole cake isn’t ideal because the texture may change, you can freeze individual slices wrapped carefully in plastic wrap and foil. When thawed slowly in the refrigerator, they still maintain good flavor and structure for up to a month.
Reheating
This dessert is best served cold and isn’t designed for reheating. Enjoy it straight from the fridge or after a brief freezer chill for that perfectly firm slice.
FAQs
Can I use fresh whipped cream instead of frozen whipped topping?
Absolutely! Freshly whipped cream works beautifully in the Red White Blue Icebox Cake Recipe, though it may be slightly less stable than the frozen whipped topping, so be gentle when folding it in and serve sooner rather than later.
What if I can’t find instant vanilla pudding mix?
You can make your own pudding mix from scratch or substitute with a good-quality ready-made vanilla pudding, but the instant mix helps create that signature texture and slightly firmer consistency that holds up well in this layered dessert.
Can I substitute other fruits for strawberries and blueberries?
Yes! While the red and blue colors are part of the charm, raspberries, cherries, or blackberries work as delicious alternatives and still keep the spirit of the cake alive.
How far in advance can I make this cake?
You can assemble the cake up to one day ahead and keep it refrigerated. Preparing it ahead enhances the melding of flavors, so it’s actually encouraged for best results!
Why do we freeze the cake before slicing?
Freezing helps firm up the layers so when you cut through, the pudding and fruit stay intact and don’t smear or squish, giving you beautiful clean slices every time.
Final Thoughts
This Red White Blue Icebox Cake Recipe is a fantastic way to impress friends and family with minimal effort but maximum wow factor. It’s a refreshing and festive dessert perfect for any occasion that deserves a little sparkle. I wholeheartedly encourage you to give it a try—once you do, it’ll quickly become one of your favorite summer treats to share and savor again and again.
Print
Red White Blue Icebox Cake Recipe
- Prep Time: 4h 15m
- Cook Time: 0m
- Total Time: 4h 15m
- Yield: 12 servings
- Category: Dessert
- Method: No-Cook
- Cuisine: American
- Diet: Vegetarian
Description
A refreshing and colorful Red White Blue Icebox Cake featuring layers of creamy vanilla pudding, cream cheese, and whipped topping, alternated with fresh strawberries and blueberries, all nestled between crispy graham crackers. This no-bake dessert is perfect for patriotic celebrations or any occasion that calls for a light, fruity treat.
Ingredients
Base Layer
- 22–24 graham crackers, approximately
Filling
- 8 ounces (227 grams) cream cheese
- 2 (3.4 ounce / 96.4 grams each) boxes instant vanilla pudding mix
- 3 cups (720 ml) cold 2% milk
- 2 (8 ounce / 227 grams each) containers frozen whipped topping, thawed
Fruit Toppings
- 3 cups (approximately 450 grams) sliced strawberries
- 2 cups (approximately 300 grams) blueberries
Instructions
- Prepare the Base: Lay a single layer of graham crackers snugly at the bottom of a 9×13 inch baking dish to form the cake’s base and keep the dessert stable during slicing.
- Make the Pudding Mixture: In a large mixing bowl, use an electric hand mixer to beat the cream cheese and instant vanilla pudding mix until smooth, about 2 minutes to avoid lumps. Slowly add the cold milk while continuing to beat until fully combined and the texture is even.
- Fold in Whipped Topping: Gently fold the thawed whipped topping into the pudding mixture until no visible streaks remain, ensuring a light and airy filling.
- Layer the Cake: Spoon about one-third of the creamy pudding mixture evenly over the graham cracker layer. Top with one-third of the sliced strawberries and one-third of the blueberries. Repeat this layering process two more times, finishing with the remaining fruit on top.
- Refrigerate to Set: Refrigerate the assembled cake for at least 4 hours to allow the layers to set and the flavors to meld together, ideally chilling overnight for best results.
- Freeze Before Serving: Freeze the cake for 30 to 45 minutes before serving to firm up the layers and create cleaner slices, minimizing crumbling when cutting.
- Serve: Carefully slice the cake with a sharp knife. Arrange extra fresh strawberries, blueberries, or mint leaves on the serving platter for added visual appeal and a festive presentation.
Notes
- Using cold milk ensures the pudding sets properly and the texture remains smooth.
- Gently folding in the whipped topping preserves its fluffiness and prevents deflating the mixture.
- Refrigerate overnight if possible to enhance flavor melding and texture.
- Freezing slightly before slicing helps maintain clean pieces and reduces mess.
- Substitute fresh or frozen fruit depending on availability, but thaw and drain frozen fruit to avoid excess moisture.


