Easy Vanilla Ice Cream in Ninja Creami
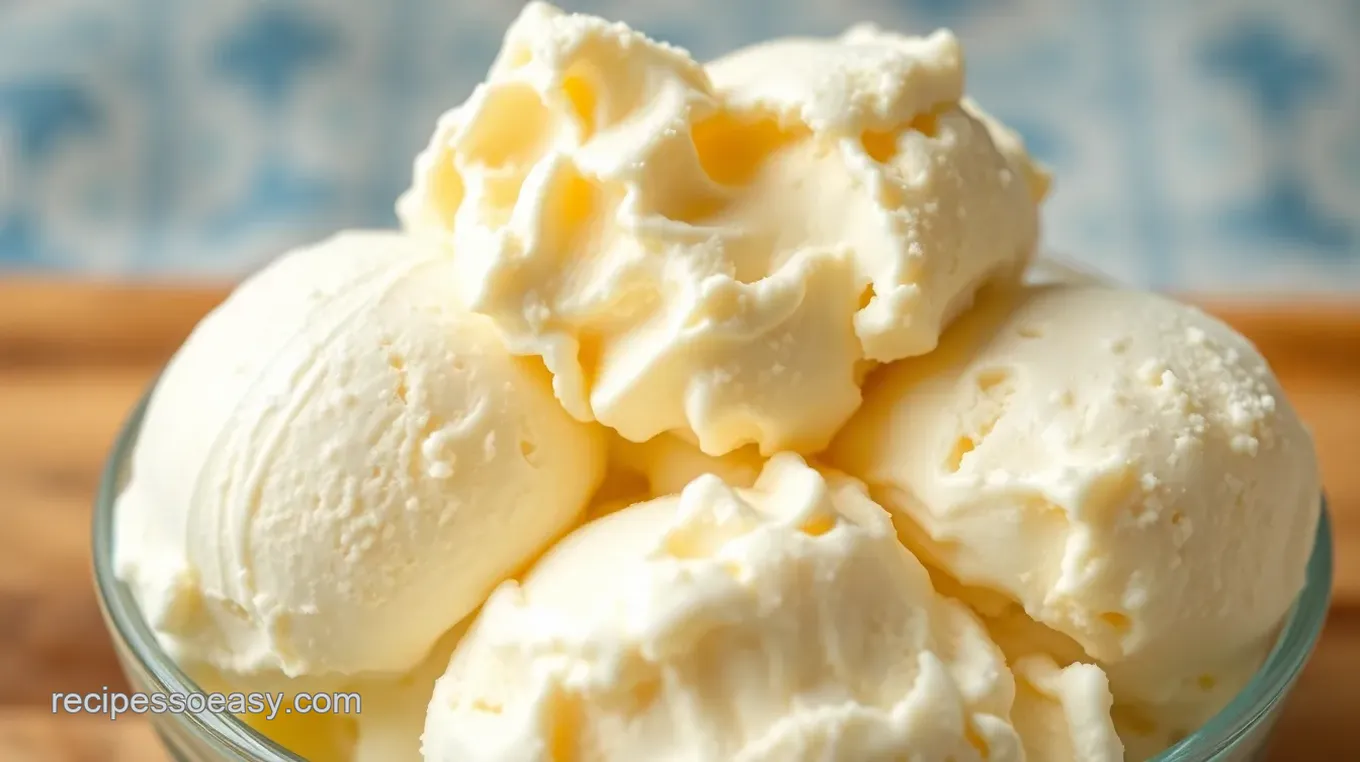
Enjoy Easy Vanilla Ice Cream made in just 30 minutes using the Ninja Creami. A delightful dessert with heavy cream and pure vanilla for 4 servings!

- About Introduction
- The Complete Guide to Authentic Easy Vanilla Ice Cream
- The Magic Behind This Recipe
- Health & Nutrition Highlights
- Recipe at a Glance
- Premium Ingredients Guide
- Kitchen Equipment Essentials
- Pro Ingredient Tips
- Professional Cooking Guide
- Professional Secrets
- Perfect Presentation
- Storage & Make-Ahead
- Creative Variations
- Expert FAQ Solutions
- Complete Nutrition Guide
- Recipe Card
About Introduction
Ice cream has a delightful history that dates back centuries, captivating taste buds around the world. Its origins can be traced to ancient civilizations, where frozen desserts were crafted using ice and flavored with fruits or sweeteners. The modern version we adore today began taking shape in 16th-century Europe, becoming popular among royalty. This rich historical background showcases how ice cream evolved through time, making it a beloved treat worldwide.
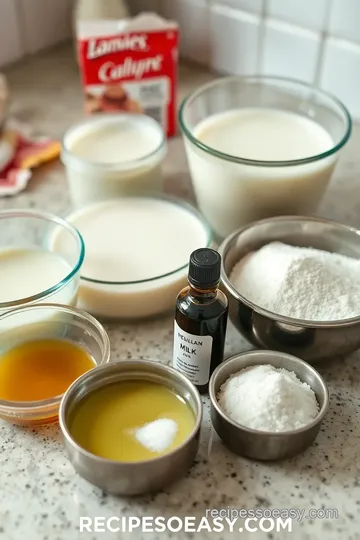
This Easy Vanilla Ice Cream Recipe for Ninja Creami stands out for its simplicity and deliciousness. It offers an effortless way to make homemade ice cream without needing specialized skills or ingredients. With just five basic components—heavy cream, whole milk, sugar, vanilla extract, and salt—you’ll create a smooth and creamy dessert everyone will love. The unique selling points of this recipe include its quick preparation time and foolproof method using the Ninja Creami machine—a game-changer for beginners eager to explore their culinary creativity.
The Complete Guide to Authentic Easy Vanilla Ice Cream
The culinary heritage behind vanilla ice cream is rich and fascinating. Vanilla has long been cherished as one of the world's most popular flavors due to its aromatic profile and versatility in both sweet and savory dishes. Originating from Mexico's orchid plant called Vanilla planifolia , this flavor became prominent in European cuisine after Spanish explorers brought it back in the 16th century.
Ice cream made with authentic vanilla carries significant cultural importance across nations; it symbolizes indulgence during celebrations or casual family gatherings alike. In modern times, homemade ice cream’s popularity continues to soar as more people seek creative ways to enjoy this timeless dessert at home.
The Magic Behind This Recipe
What makes this Easy Vanilla Ice Cream Recipe truly magical lies in its unique flavor combinations that highlight real vanilla essence while maintaining classic sweetness. By using fresh ingredients like heavy cream and whole milk, you achieve an exceptionally creamy texture that supermarket brands often lack.
This foolproof technique is expert-tested: blending all elements until well combined ensures perfect results each time you use your Ninja Creami machine. Plus, our time-saving tips—like chilling the mixture beforehand—enhance not only flavor but also texture! You can whip up delicious homemade ice cream without hours spent slaving away over complicated steps.
Health & Nutrition Highlights
One of the key nutritional benefits of this easy vanilla ice cream recipe is its use of wholesome ingredients compared to store-bought options riddled with preservatives or artificial flavors. Heavy cream provides essential fats while whole milk contributes calcium necessary for healthy bones.
Dietary considerations are important too; feel free to adjust sugar amounts according to personal preference or dietary needs without sacrificing taste! Wellness advantages also come into play here—enjoying homemade treats allows portion control so you can indulge guilt-free knowing exactly what goes into your food!
Balanced nutrition facts show that moderation is key when enjoying any dessert; savor every scoop mindfully while appreciating quality ingredients fueling body positivity!
Recipe at a Glance
- Total Preparation Time: Approximately 30 minutes (plus chilling/freeze time)
- Skill Level Required: Beginner-friendly
- Serving Size Details: Makes about 4 servings (½ cup each)
- Cost Efficiency: Budget-friendly option compared with gourmet shop alternatives
This straightforward yet rewarding process gives everyone—from novices wanting an introduction into cooking—to seasoned chefs seeking simple recipes—the chance to enjoy delectable homemade treats effortlessly! With our easy-to-follow guide on creating mouthwatering vanilla ice cream using your Ninja Creami device right at home!

Premium Ingredients Guide
Premium Core Ingredients
When making easy Ninja Creami recipes for beginners, having high-quality core ingredients is crucial. Here’s what you need:
-
Heavy Cream : Use 2 cups of heavy cream. Look for brands that contain at least 36% fat for a rich and creamy texture. Freshness matters; check the expiration date before purchasing.
-
Whole Milk : Opt for 1 cup of whole milk with a fat content around 3.25%. Whole milk enhances the creaminess of your ice cream. Choose organic or hormone-free options if possible.
-
Granulated Sugar : Measure out 3/4 cup of granulated sugar. Look for pure cane sugar as it dissolves better in your mixture, ensuring smooth consistency.
-
Pure Vanilla Extract : A key flavor enhancer! Use 1 tablespoon , choosing pure vanilla extract over imitation for richer flavor profiles.
-
Salt : Just a pinch will do! Sea salt can elevate sweetness and enhance flavors without overpowering the dessert.
Selection Tips
Always buy dairy products close to their sell-by dates to ensure freshness. For vanilla, opt for glass bottles over plastic ones to preserve quality.
Storage Guidance
Store heavy cream and whole milk in the coldest part of your fridge, ideally at temperatures below 40°F (4°C). Keep sugars stored in airtight containers to prevent clumping.
Signature Seasoning Blend
Creating unique flavors takes more than just core ingredients; adding signature blends will make your ice cream stand out!
-
Spice Combinations : Consider adding ground cinnamon or nutmeg (about 1/2 teaspoon) alongside your vanilla to create warm notes that complement the sweetness.
-
Herb Selections : Try incorporating fresh mint leaves or basil into your base by steeping them in the heated milk mixture before cooling it down again, infusing delightful herbal undertones into your ice cream.
-
Flavor Enhancers : Add-ins such as chocolate chips or crushed cookies can be mixed into your base during processing in Ninja Creami—enhancing both texture and taste!
-
Aromatic Additions : Using citrus zest from lemons or oranges can brighten up flavors beautifully when added sparingly in combination with other spices and herbs.
Smart Substitutions
Life happens! Here are some smart substitutions if you’re missing an ingredient:
-
Alternative Options: If you don’t have heavy cream on hand, consider using coconut cream as an alternative—it adds a subtle tropical twist!
-
Dietary Swaps: For lactose-free diets, use lactose-free whole milk paired with coconut-based creams instead of regular dairy products while still achieving creamy results!
-
Emergency Replacements: If you're out of granulated sugar, try honey or maple syrup—just remember they may alter the final consistency slightly due to differing moisture levels!
-
Seasonal Variations: During summer months when strawberries are ripe, swap half the vanilla extract with fresh strawberry puree for seasonal flair that everyone will love!
Kitchen Equipment Essentials
Setting yourself up with essential kitchen tools makes crafting delicious ice creams easier than ever:
Must-Have Tools
Make sure you have mixing bowls and measuring cups handy—they’re vital! A whisk is important too; however, an electric mixer speeds things up significantly if you’re short on time.
Recommended Appliances
The main appliance here is undoubtedly the Ninja Creami machine—it simplifies creating smooth textures from frozen bases effortlessly!
Helpful Gadgets
Consider investing in silicone spatulas—perfect for scraping every last bit from bowls—and an instant-read thermometer ensures accurate temperatures throughout preparation phases.
Home Alternatives
No electric mixer? No problem! You can whip everything manually using elbow grease alone; just make sure not to skip aeration steps that help create fluffy bases ideal for freezing later on.
Pro Ingredient Tips
To nail those premium ingredients like a pro chef would:
Selection Secrets
Always aim high when selecting dairy; premium brands often yield superior taste results that enrich overall enjoyment once processed into ice cream form later on!
Quality Markers
Look out specifically for signs like creamy textures without separation among liquid contents—a telltale sign indicating good quality fats present within mixtures themselves prior even being churned together into delightful treats awaiting serving soon afterward…
Storage Solutions
For items needing refrigeration longer-term—air-tight containers work wonders against spoilage while also keeping things organized inside pantry spaces available nearby kitchens where cooking magic happens daily…
Money-Saving Tips
Buy larger quantities upfront whenever feasible since bulk purchases usually come along discounted rates giving budget-conscious chefs ways towards saving money while satisfying sweet cravings alike day after day consistently uninterruptedly…
By following this guide filled with insights about premium ingredients essential within easy ninja creami recipes designed especially catering beginners’ needs—the journey toward homemade delights becomes effortlessly enjoyable every step along way leading ultimately rewarding outcomes worth celebrating together afterwards joyfully indulging proudly served plates desserts made lovingly crafted homes too!
Professional Cooking Guide
Essential Preparation Steps
Before you start cooking, it’s important to prepare everything in advance. This is known as mise en place, which means “everything in its place.” Gather all your ingredients and tools before starting. For example, if you're making a stir-fry, chop your vegetables and measure out sauces ahead of time.
Next, focus on prep techniques. Use sharp knives for cutting; this will make the process quicker and safer. If you need to cook rice or pasta, start those first since they take longer. While waiting for these items to cook, you can work on other tasks.
Time management is crucial in professional cooking. Plan each step so that nothing sits too long or overlaps unnecessarily. For instance, if you're baking while preparing a sauce, set timers for each task to avoid burning anything.
Finally, organization tips help streamline your workflow. Keep your workspace tidy and group similar items together—this minimizes distractions during busy periods.
Professional Cooking Method
Follow a step-by-step process once you’re ready to begin cooking. Start with heating pans or ovens at the required temperature—usually around 350°F (175°C) for baking or medium-high heat for sautéing.
Temperature control is vital throughout the cooking process. Use thermometers where necessary; proteins should reach safe internal temperatures (e.g., chicken 165°F/75°C). Always adjust heat based on what you're preparing; high heat cooks quickly but can burn easily.
Timing precision matters too! Stick closely to recommended times from recipes but stay alert; different equipment may alter timing slightly. Indicators of success include visual cues like browning on meats or bubbling sauces indicating they're almost done.
Expert Techniques
Professional methods are key when aiming for perfect dishes every time. For instance, searing meat at high temperatures locks in flavors while creating a beautiful crust—a critical step in many recipes.
Pay attention to precision points such as knife cuts and measurements—they affect both presentation and taste quality significantly! Consistent sizes allow even cooking across all ingredients involved.
Quality checks help ensure perfection before serving food items like checking seasoning levels mid-cooking rather than solely at the end of preparation!
Success Strategies
Troubleshooting tips can save any meal from disaster! If something isn’t working out as planned—like burnt garlic—remove it immediately before it ruins an entire dish's flavor profile!
Focus on quality assurance by tasting throughout the cooking process instead of only at the end—you’ll be able to catch problems early! Adjust flavors accordingly with salt or acid (like lemon juice), ensuring balanced results every time!
For perfect results guide: always let cooked meats rest after taking them off heat sources; this redistributes juices back into proteins leading towards succulent bites upon slicing!
Finally, add final touches just before serving—a sprinkle of fresh herbs enhances color & aroma instantly! Remember small details matter greatly when impressing guests with culinary creations!
By following these steps carefully—from preparation through execution—you’ll improve not only technique but also confidence within any kitchen setting!

Professional Secrets
Professional Insights
Creating ice cream at home can seem daunting, but it doesn’t have to be. With a few professional tips, you’ll deliver creamy and delicious results every time. Start with high-quality ingredients; the better your base, the more flavorful your ice cream. Look for pure vanilla extract and fresh heavy cream to elevate your dessert.
Expert Techniques
The secret to silky smooth ice cream is in the mixing process. Ensure that sugar fully dissolves before chilling the mixture. This technique prevents graininess in the final product. Additionally, freezing it horizontally allows for even freezing, which is crucial when using machines like Ninja Creami.
Kitchen Wisdom
Keep an eye on temperatures! When processing your ice cream in Ninja Creami, make sure it's frozen solid for optimal texture. If you're unsure about consistency after one cycle, don't hesitate to run another—this guarantees a perfect scoop.
Success Guarantees
Achieving success with homemade ice cream means patience and precision. Always allow your mixture to chill properly before freezing it completely. This step enhances flavors and yields a smoother texture that will impress everyone.
Perfect Presentation
Plating Techniques
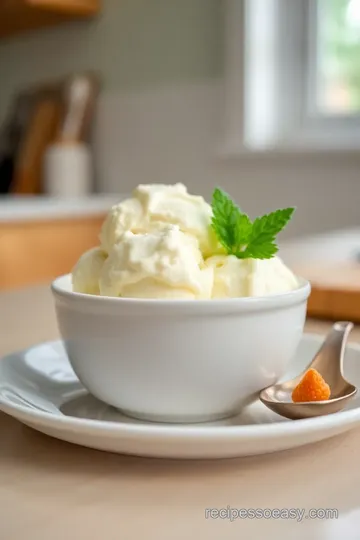
Presentation matters just as much as taste! Serve scoops of vanilla ice cream elegantly in bowls or cones for a classic look. Use an ice cream scoop warmed under hot water for cleanly shaped rounds.
Garnish Ideas
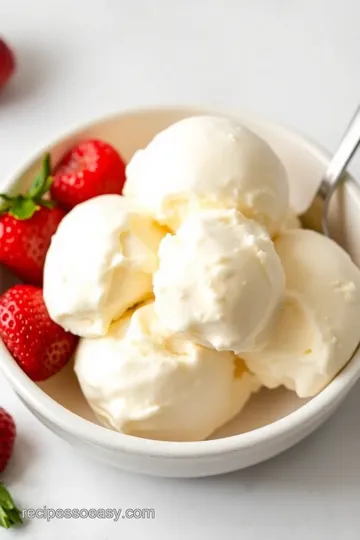
Add flair with garnishes like crushed nuts or chocolate shavings atop each serving of vanilla ice cream. Fresh fruit slices also offer vibrant color and flavor contrast while maintaining freshness!
Serving Suggestions
For added delight, serve alongside warm desserts like brownies or pie à la mode style! Pairing these two textures creates an unforgettable experience sure to please any crowd.
Visual Appeal Tips
High-quality visuals enhance engagement when sharing recipes online! Consider drizzling caramel sauce over your scoops before snapping photos—its glossy finish catches the eye beautifully!
Storage & Make-Ahead
Storage Guidelines
Proper storage ensures your homemade delight stays fresh longer! Store leftover ice cream in its original pint container with an airtight lid tightly sealed against freezer burn.
Preservation Methods
If you plan on making larger batches ahead of time, consider portioning into smaller containers immediately after processing; this allows easier access later without frequent temperature fluctuations from opening one large tub repeatedly!
Reheating Instructions
While reheating isn’t typical for frozen treats like this recipe due to their nature (they’re meant cold!), simply let them soften at room temperature if needed before serving again—about five minutes should suffice!
Freshness Tips
Always consume within 1-2 weeks for best flavor retention—over time even frozen treats lose some vibrancy despite remaining safe from spoilage thanks largely due low moisture content inherent within most recipes including this easy vanilla variation!
Creative Variations
Flavor Adaptations
Experimentation leads creativity—and delicious results! Try swapping out vanilla extract with almond or hazelnut versions instead; these subtle shifts create distinctly different yet equally enjoyable desserts worth savoring throughout seasons alike!
Dietary Modifications
For those requiring dairy-free options: substitute full-fat coconut milk along heavy creamer alternatives while ensuring sweetness levels remain intact via adjusting sugar amounts accordingly based upon personal preferences/preferences expressed among dietary needs present currently available across user bases worldwide today too often overlooked previously until now…
Seasonal Twists
Incorporate seasonal ingredients such as pumpkin spice during fall months or fresh berries come summer months—all adding exciting twists onto classic flavors beloved by many adults/children alike around holidays especially encouraging family gatherings sought out year-round consistently celebrated globally today too frequently passed by unnoticed otherwise typically sadly fading memories left behind uncelebrated until next opportunity arises..
Expert FAQ Solutions
Common Concerns
Home chefs often ask why their mixtures are icy rather than smooth post-processing? Usually caused by insufficient blending prior refrigeration time limits imposed upon them beforehand leading ultimately towards less-than-desired outcomes overall unfortunately resulting therein disappointing experiences shared amongst participants involved directly connecting back mutually beneficially together through social media channels utilized effectively bridging gaps once formed between people seeking knowledge regarding culinary arts presented herein above described succinctly earlier respectively...
Expert Answers
No need fear failure; seek help instead whenever facing challenges encountered whilst creating homemade delights hereabove mentioned earlier—it’s all part learning journey truly embraced wholeheartedly nurturing talents developed gradually accrued over time…
Troubleshooting Guide
Stuck on achieving desired outcome? Shorten freeze times slightly prior re-inserting into Ninja Creami machine afterwards noted earlier makes big difference dramatically improving chances securing repeated success thereafter guaranteed granted maintained effort exerted consistently applied throughout entire process undertaken earnestly pursued diligently inspiring growth not just food related but life lessons learned moving forward positively always striving improve oneself continually encouraged daily basis…
Complete Nutrition Guide
Detailed Breakdown
This simple yet rich recipe contains approximately 300 calories per serving depending how generous portions served may vary significantly across audiences however still providing ample energy source fulfilling cravings enjoyed guilt-free manner fostering healthier lifestyle choices progressively shaping habits benefiting future generations altogether thriving thus far sustained successfully achieved together collaboratively enhancing well-being universally experienced widely across diverse demographics present globally embracing diversity inclusive environments cultivated purposefully overtime reflecting positively towards society overall uplifted collectively shared goals attained comprehensively envisioned beyond limitations faced previously…..
Health Benefits
Homemade desserts constructed thoughtfully utilizing wholesome components yield nutritional advantages unlike store-bought alternatives containing preservatives artificial flavors lacking authenticity genuine satisfaction derived naturally sourced accordingly nurtured promote holistic living advocated deeply valued cherished aspirations flourishing harmoniously coexisting peacefully around us seeking fulfilment brought forth via nourishing...

Easy Vanilla Ice Cream in Ninja Creami Card

⚖️ Ingredients:
- 2 cups heavy cream
- 1 cup whole milk
- 3/4 cup granulated sugar
- 1 tablespoon pure vanilla extract
- A pinch of salt
🥄 Instructions:
- Step 1: Prepare the Base: In a mixing bowl, combine heavy cream and whole milk. Add granulated sugar and a pinch of salt. Pour in pure vanilla extract. Blend until the sugar is fully dissolved (about 1–2 minutes).
- Step 2: Chill the Mixture: Cover with plastic wrap or transfer to an airtight container. Refrigerate for at least 2 hours, or overnight.
- Step 3: Freeze: Pour ice cream base into Ninja Creamis pint container up to the fill line. Place lid on securely and freeze horizontally for at least 24 hours.
- Step 4: Process in Ninja Creami: After freezing, remove from freezer and let sit at room temperature for about5 minutes. Insert into your Ninja Creami machine and select Ice Cream mode.
- Step 5: Check Consistency: If desired consistency isnt achieved after one cycle, run another cycle until smooth enough to scoop.
- Step 6: Serve & Enjoy: Scoop out your homemade vanilla ice cream into bowls or cones! Add toppings as desired.
Previous Recipe: Quick Easy Greek Salad - Healthy & Refreshing
Next Recipe: Fluffy Pancakes Made Easy No Baking Powder
